![<?echo $_SERVER['SERVER_NAME'];?>](/template/twentyseventeen/skin/images/header.jpg)
The beauty of the wallboard comes from the production and installation process. The following GO Jiaju urinate will introduce to you!
Production process of log siding
The production process of log wallboard is complicated and delicate, especially the European style solid wood carved wallboard, which is purely hand-made and more perfect.
1. Production process of log wall panel:
01
Raw material processing

Manufacturers need to adopt scientific and standardized management methods, especially in environmental protection control, there are three unique points:
1. Raw material inspection. In the process of raw material inspection, the suppliers of raw and auxiliary materials are screened first, the materials with the lowest formaldehyde content are selected, and E1 grade plates and benzene-free spray materials are used to meet the environmental protection requirements from the source;
2. Production quality and quantity. During the production process, ensure the quality of products and reduce the use of raw materials containing harmful substances;
3. Constantly try to innovate. Is to use new materials and new processes, constantly update products and improve production technology;
Environmental protection is also an important link in the production process. Environmental protection is not a slogan, but must be proved by actual actions.
02
Hand carved
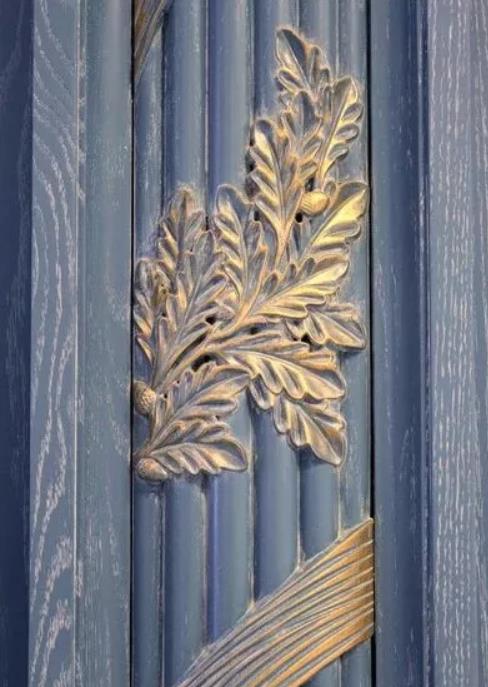
The wallboard is purely hand-operated. It takes half an hour for the carpenter to carve a pattern. The reason why the carved wood furniture is expensive and takes a long time is here.
To sum up, the whole carving process is divided into 4 steps: pen drawing, initial carving, fine carving, and polishing.
When carving: Each hand-carving worker holds more than 20 kinds of carving tools and drills various flower patterns on the solid wood bed foot, bed back and other parts, which is very beautiful.
After carving: Judging from the carved parts that have been processed, no hand-carved patterns can be copied, because each kind is carefully carved by hand, especially precious.
03
Spray paint
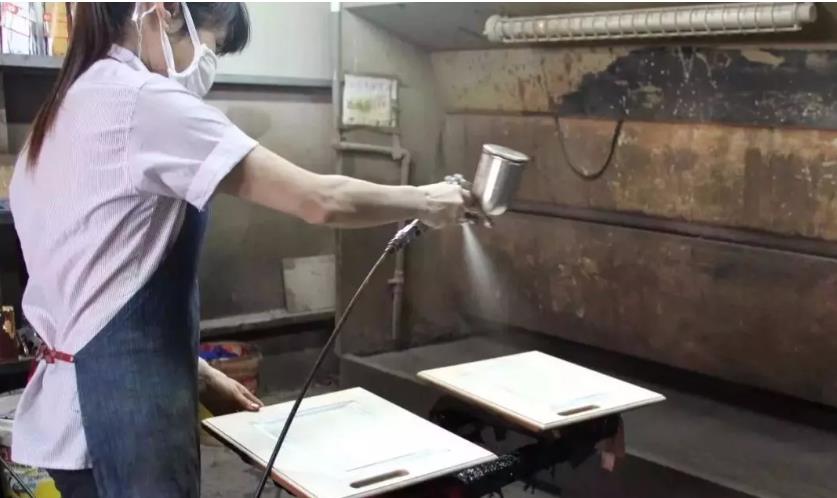
Spray painting should be done in many workshops, sand oil, sanding, spraying primer, repairing and finishing, spraying moderate paint, foiling, topcoat and so on. Spray the primer at 2 degrees, repair the color (wood veneer, wood chromatic aberration treatment), spray paint, polish, then manually paint three degrees, repeatedly polish six or seven times, and finally the topcoat. If it is a product with gold and silver foil processing requirements, it must be processed before spraying the topcoat.
Looking at the paint painting process, it is not as simple as you imagined. Priming and polishing are enough. You also need to paint experience and level. The texture of the solid wood will slowly show through the painting and polishing. According to the original structure of the wood grain, local polishing is carried out, so that the pattern is deep and shallow, and it looks more three-dimensional and beautiful.
If you enter the closed workshop with gold foil and silver foil, after the original color wood products are inlaid with gold and silver, the strong European flavor will be reflected. Each foil is about 20 cm x 20 cm, all by hand collage It is understood that "This is purely technical work, and it will not work without more than ten years of collage experience."
04
From semi-finished products to finished products
If the solid wood panel is not counted as machine processing, the manual part will go through more than 30 manual processes, which shows the tedious and delicate process.
05
package
Packaging is the last process before the finished product is completed, and it is also a relatively important part of a product. The packaging process includes the simple assembly of the product, the assembly of the foreskin, the velvet cloth, the hardware, the production of the packaging, the quality inspection of the previous process of the product, and the packaging of the product.
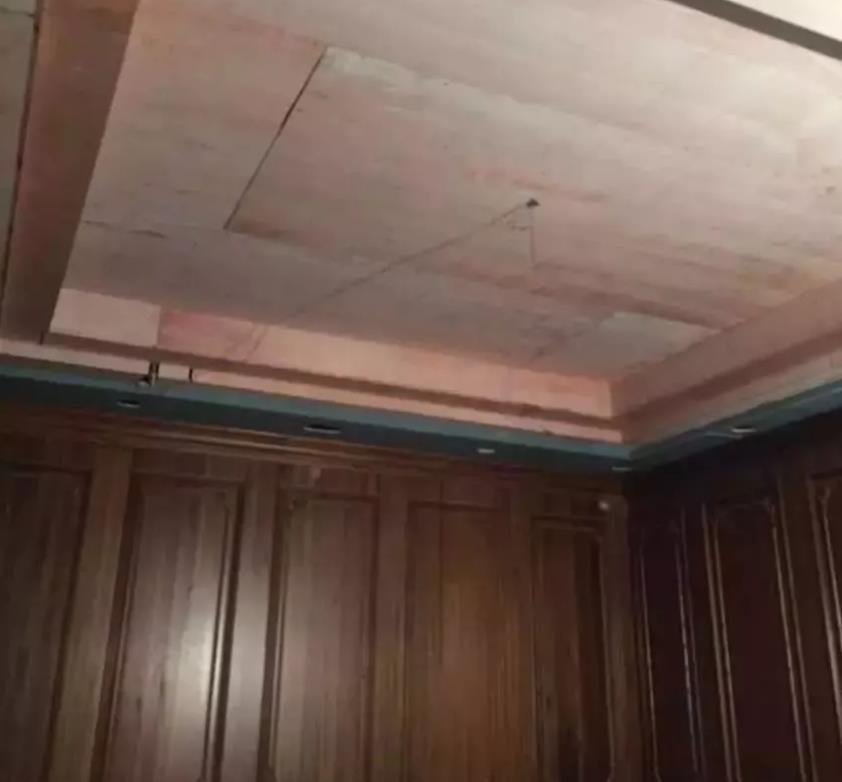
Second, the installation process of log siding
01
Preparations for the installation of solid wood panel walls

1. Bouncing thread;
2. Check the hole and buried parts;
3. Make and install wooden keel;
4. The wallboard should pop up the horizontal line of the installation height in advance according to the design requirements;
5. Check whether the door and window openings are square and whether the pre-buried wooden bricks or connecting iron parts meet the requirements;
6. According to the height and the size of the room, the partial wooden siding is made into a dragon skeleton, which is installed in whole or in separate plates;
7. The full-height wood wall panel is leveled and straightened according to the four corners of the room and the upper and lower keels, and the wooden standard reinforcement is made from top to bottom according to the size of the panel, and then the horizontal and vertical keels are nailed in the gap according to the design requirements;
8. The spacing of the keels of the wooden retaining wall. When the design does not require, the general horizontal keel spacing is 300MM, and the vertical keel spacing is 400MM. If the panel thickness is above 10MM, the horizontal keel spacing can be enlarged to 40MM;
9. The wooden keel must be installed and straightened. In addition to the thickness of the board, the gap between the skeleton and the wooden bricks should be filled with wooden pads and nailed. Each wooden brick should be nailed with at least two nails.
02
Solid wood wall panel installation

1. Whether the panel is log or plywood, the color and pattern should be selected and used in the same room; when installing the wallboard, the convex surface of the annual ring of the wooden board should be placed inward, and the wood grain and color of the adjacent panel should be similar .
2. When cutting the board, it should be slightly larger than the actual size of the dragon skeleton. The large side is a net sign, the small side is straight, the root of the wood grain is downward. When the length direction needs to be butted, the pattern should be smooth, and the position of the joint should avoid the line of sight. The jointing of the wallboard is generally 1.2M below the ground. At the same time, the position of the joint must be on the horizontal keel. When the wooden siding needs to be divided into blocks, if it is not required by the design, it can generally be made into 6-10MM flat groove or figure eight groove. The position of the groove should be on the vertical dragon skeleton.
3. The finished panel should be planed and polished. After proper fitting, a layer of moisture-proof paper is affixed to the back of the wallboard to formally install it. The joint should be nailed with adhesive, the length of the nail of the fixed board is 2-2.5 times the thickness of the panel, the spacing is generally 200MM, the nail cap should be flattened, and the nail cap is punched into the surface layer 1 along the wood grain direction with a sharp punch -2MM.
03
Precautions for installation of solid wood panel
1. To avoid the thickness of the top wall of the wallboard, unevenness, splitting, etc .; it is mainly due to the carelessness of selecting wooden bead with the same thickness and similar color. Before operation, the cable should be pulled to check whether the top of the wallboard is straight, and any problems should be corrected in time.
2. Avoid loose or uneven joints or cracking: mainly due to the large moisture content of the wood and shrinkage after drying. The cause of unevenness is often due to too small nails, too large nail distances, and missing adhesives, etc.
3. Avoid the disorder of the surface layer, uneven color, uneven corners, uneven surface, black lines at the seams and loose seams, etc .; mainly due to careless selection of fabrics and operation. The wood type, color and pattern should be used in the same room; before the panel is installed, the size of the block should be designed, and each block should be straightened and then tried and installed once. Stapling.
04
Installation details of solid wood siding
As the saying goes, details determine success or failure, especially in the decoration. Pay attention to the details when installing the siding, in order to install a better wall surface.
1. Keep the wall clean
Before installation, the wall should be clean, dry and flat, and the height of the elastic line is leveled. In order to adapt to the local climate conditions and achieve the moisture content of the air, the purchased wallboard should be unpacked and stored in place for at least 48 hours before installation. .
2. Design the size in advance
Before installing the panel, you should first design the size of the blocks, and straighten each block to try and install it once. After adjustment and repair, it will be officially nailed to avoid the disorder of the surface layer, uneven color, and uneven corners. Straight, uneven surface, black lines at the seams and loose seams.
3. Pull the cable to check the top plate
Before operation, the cable should be pulled to check whether the top of the wallboard is straight, and any problems should be corrected in time. Avoid uneven thickness, unevenness, splitting, etc.
4. The wall needs to be treated with moisture
Due to the high moisture content of the wood, it tends to shrink after drying, causing the joints to be uneven or cracked. Therefore, if the wall surface is wet, construction should be done after drying or moisture-proof treatment.
| Moisture-proof method of wallboard | |
| 1 | First make a moisture-proof layer on the wall and apply waterproof and moisture-proof paint |
| 2 | Leave vents on and under the wall |
| 3 | Through the picking of wooden bricks in the wall, the panel, wooden keel and the wall are separated by a certain distance to avoid the influence of moisture on the panel |
5. There should be gaps on the panel surface
The height difference of the surface of the wall panel should be less than 0.5mm; the width of the gap between the panels should be uniform and the size deviation should not be greater than 2mm; the deviation of the diagonal length of the single panel should not be greater than 2mm; .
6. The angle of yin and yang should be horizontal and vertical
The yin and yang corners of the wallboard are the key points and difficulties of the construction, and special attention should be paid. The angle of yin and yang must be vertical and horizontal, and the joint of stitching is 45 °.
7. The baseboard and bead should be close to the panel
The skirting board and the bead should be close to the panel, and no excessive gaps should be left. The distance between the nails for fixing the skirting board or the bead is generally not more than 300mm; the nail cap should be knocked flat, the depth into the slats is 0.5 ~ 1.0mm, and the nail holes should be smoothed with the same color oily putty.
The above is a detailed introduction to the process flow from log production to installation. How about it?
Ultrafine Silica Median Particle Size 1.5~2.5
Densified Silica Fume,Crystalline Quartz Sand,Modified Ultrafine Silica,White Silica Fume
Changxing Wanxing Building Material Co., Ltd. , https://www.wxbuildingmaterials.com