![<?echo $_SERVER['SERVER_NAME'];?>](/template/twentyseventeen/skin/images/header.jpg)
The closet is one of the indispensable furniture in our home life, bringing great convenience to people's lives. After the main body of the closet is built, we must consider the installation of the closet door. Then what is the installation method of the closet door? What is the need to pay attention to? Here, Xiao Qi demonstrates the installation steps of the closet door for everyone. Everyone brings installation notices.
First, wardrobe door installation steps
1, first on the track installation. Before the installation, the wardrobe should be laid flat with the door closed. At the bottom of the sliding door, the track is placed at the middle of the door cover at the bottom of the sliding door.

2, with a soft ruler can be marked with a marker pen in the middle; then use the upper track gestures, draw holes that need to be fixed with screws and then drill, first fix the two sides, and then fix the middle part, that is to complete the installation of the upper track.

3, the two sides of the fixed position, the middle part of the drilling.

4. Before installing the lower rail, clean the door frame with a rag first. The positioning of the lower rail is the same as the method of appeal on the track.

5. Position the lower track, first place the sliding door inside the lower track, and then adjust it to the best position so that the sliding door can slide freely.

6. Fix the position of the lower rail. Whether it is a new wardrobe or an old wardrobe, there will be a lot of dust during installation. At this time, clean the inner track with a brush. Tighten all joints with a screwdriver.

7. Start sliding door installation. Gently lift the door so that the upper pulley of the door smoothly enters into the upper track, the left hand presses the sliding door hard, and the right hand presses the lower pulley so that the lower pulley can smoothly enter the lower track.
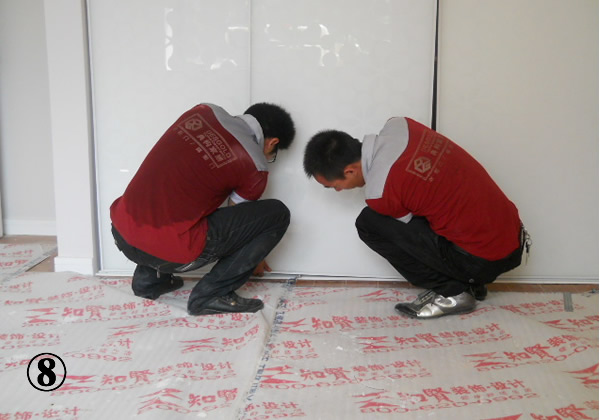
8, so that the sliding door is installed smoothly, in the protection of the sliding door, the next step against the collision bar, the purpose is to protect the sliding door to prevent children from bumping.
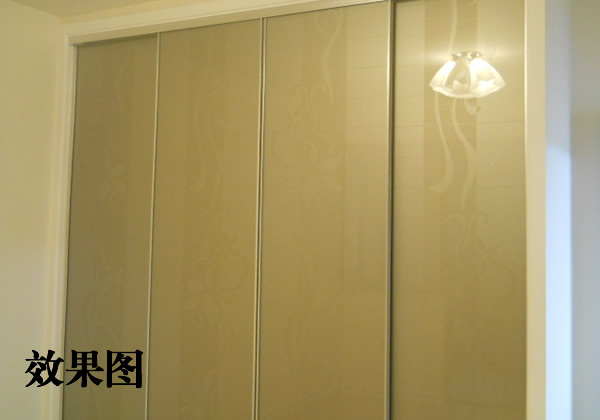
9, wardrobe installation completed renderings. However, when it is relatively difficult to put the pulley, it is better to have two people with each other to install more easily.
Second, wardrobe doors attention
1. The installation position of the closet door should be considered during the decoration design. During the construction period, the size should be measured and reserved. It should be installed after the renovation is completed. In order to ensure the overall style of the decoration design, it is better to put the brand and style of the wardrobe door before the renovation, and the professional must be measured on the door, otherwise the error of more than 5mm is difficult to make up for.
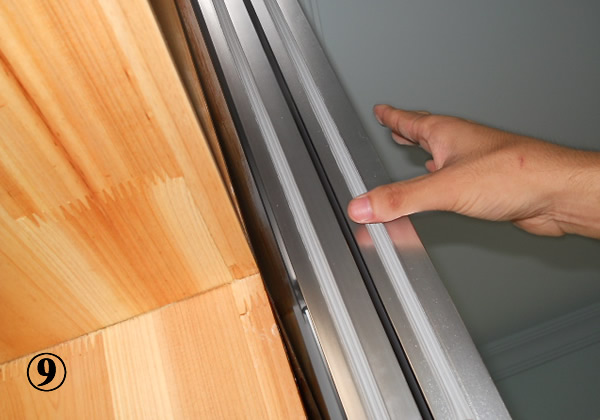
2, good wardrobe door is very useful with hardware: the upper and lower rails and the upper and lower pulleys. Each time the pulley is opened, it slides in the upper and lower rails, so the upper and lower rails require high strength and do not deform. The entire weight of the door panel is also borne by the bottom wheel, and its strength and load-bearing capacity determine the life of the wardrobe door.
3. The thickness of the wardrobe door panel is also critical. It is better to choose 10 mm or 12 mm thick plate, which is more stable to use; too thin plate is easy to deform, it is difficult to meet the requirements of normal use.
The article is summarized: The above has introduced the wardrobe door installation step plan and the purchase notice matter, hopes to help everybody. The wardrobe is designed according to the location and area of ​​the installation. To find a professional construction master, design and make the wardrobe. In order to achieve the best results.
Wardrobe door installation steps
Prestressed Wire,Concrete PC Wire,Reinforcement Steel Wire,High Tensile Prestressed Wire
Shandong Xindadi Holding Group Co., Ltd , https://www.xindadipcwire.com